
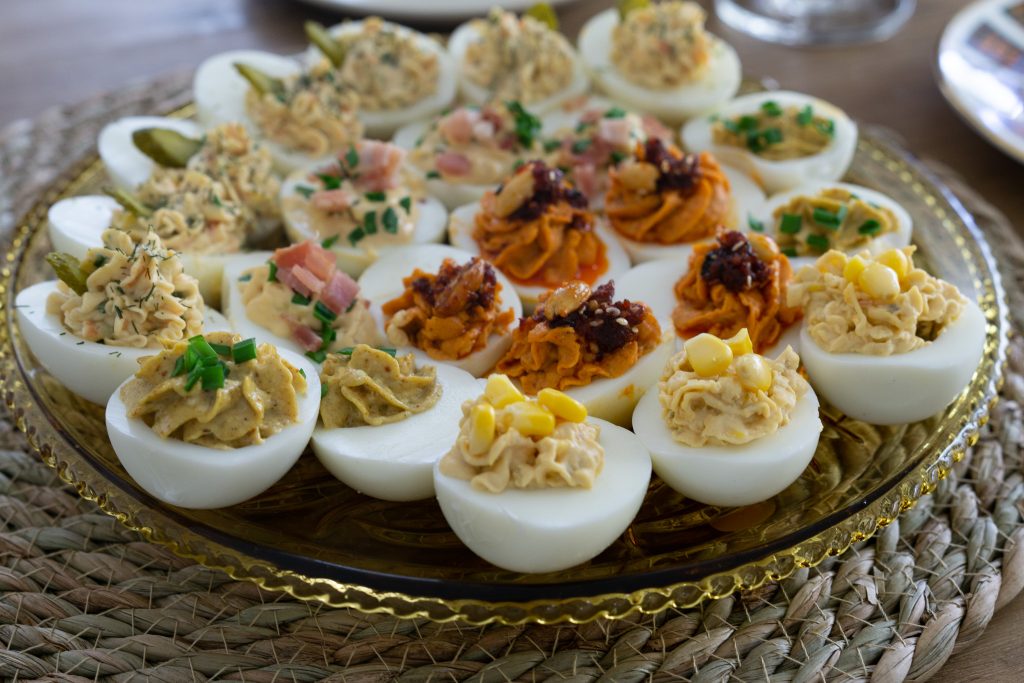
In case you weren’t aware, deviled eggs are making a comeback. Just like egg mayo toast is practically breaking Tik Tok right now, the Greats of the cooking world are also looking back to the past and bringing forward deviled egg recipes in one mind-blowing incarnation after another. The inspiring thing is, that since the 70’s & 80’s when this gorgeous little googie was an every-gathering essential, we’ve now got access to an entire planet’s worth of ingredients… so deviled eggs be basic no more.
This particular recipe took its inspiration from a post that went viral with 12 different types of deviled eggs on it. It featured everything from original curry mayo to caviar and creme fresh and right in the middle of these mad creations was a gochujang and kimchi egg calling me into action… I love Korean flavours, and I already knew how well Rayu goes with eggs, so this recipe was pretty much inventing itself right in front of me. Plus it was an awesome excuse to throw a deviled egg party, because why not, 1773 again somewhere, surely!
Where the divil did these eggy treats come from…
As far as we know, this popular little party bight originated in ancient Roman times where it was traditionally served at important gatherings as eggs prepared with mustard, pepper, or other spicy ingredients stuffed into the yolk cavity. At the time “deviled” was a term that was used to describe spicy or zesty food, hence the name “deviled’ egg… sadly and far less entertainingly, not from a dark history of satanic yolk-based rituals as one might have imagined.
So popular and so abundant were these offerings in the ancient culinary world, that they even helped to coin the now lesser-known phrase “ab ovo usque ad mala“, meaning “from eggs to apples”, or from the beginning of a meal to the end. Usually used when describing which in laws were coming to dinner and how long they might stay, even then, family had its challenges.
There are some rumours, however, that the true original may actually have been in the Andalusian region of Spain. According to the English translation of a recipe found in an unnamed 13th-century Andalusian cookbook, boiled egg yolks were mixed with cilantro (coriander), pepper, and onion juice, then beat with murri (a sauce made of fermented barley or fish), oil and salt. Whilst it does sound delicious, it would turf the Romans out of their current throne and we all know how they hated that, so for now we’ll just ignore the Spanish. Let’s face it, in terms of decent cuisine, they don’t exactly need the extra props anyhow.
If they’re scrambled I can eat two, if they are deviled I can eat forty
anonamous
Recipes for hard-boiled eggs stuffed with herbs, cheese and raisins can also be found in the cookery texts of many Medieval cookery books and are even referenced in folk law and children’s stories. Today this popular dish is considered a retro chic feature at dinner parties and gatherings world wide, and no one even minds if they spicy or not. That said, this gorgeous creation has a pleasant kick to two that’ll get your tastebuds tingly with delight.
Looking for other tasty appetizers? Try these: Tasty Thai chicken meatballs!
Making perfect deviled eggs
- Boil those eggs like a boss. No one likes an overcooked or undercooked egg. Aim for that perfect, creamy yolk by boiling your eggs just right. (about 8 minutes) Pro tip: start with eggs at room temperature for even cooking.
- Ice, ice, baby! After boiling, plunge those eggs into an ice bath to stop the cooking process. This prevents that unsightly greenish ring around the yolk and keeps them looking and tasting fantastic.
- Get your mash on! Mash those yolks until they’re smooth like butter. No one wants lumpy deviled eggs. Use a food processor if you’re really keen (and have the volume to make it work)
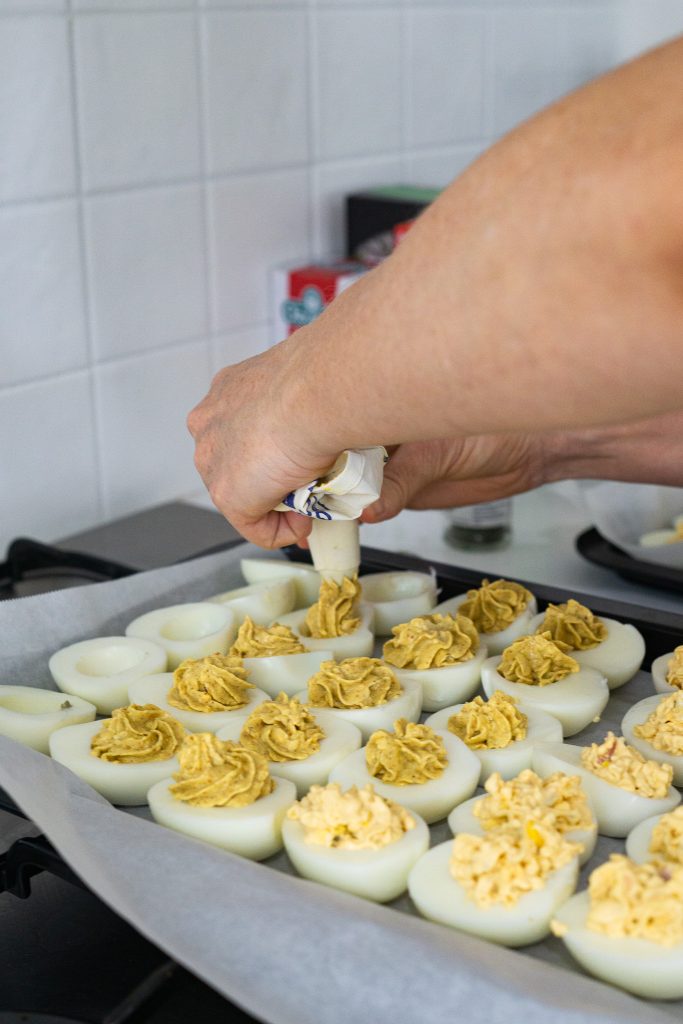
- Piping hot! Don’t skimp on presentation. Use a piping bag with a toothed nozzle to elegantly fill your egg whites. It really helps the aesthetic appeal!
- Mayo nay astray. Mayonnaise actually emulsifiers into the yolk itself so it really does help to create the best creamy filling – bare this in mind when choosing to go wild with your creations.
- Time to chill. Pop those filled eggs into the fridge to chill for at least an hour before serving. Not only does this give the flavors a chance to meld, but it also ensures that your deviled eggs are refreshingly cool and ready to impress.
- Garnish like a pro. A sprinkle of fresh herbs, a dusting of smoked paprika, or a few tiny bacon crumbles can take your deviled eggs from ordinary to extraordinary. Get creative with your garnishes!
- Handle with care. Transporting deviled eggs can be a delicate operation. Invest in a handy deviled egg carrier if you’re going to get serious about your h’ordourve game.
- Pro tip: Add some of the filling onto the plate under your eggs to serve, it will help keep them in place and not slip slip away… at least on the plate, you’re not responsible for your clumsy guests.
- Pop out the filling, that’s right, you don’t have to scrape the bleeding insides our, save time and energy by jiggling your little half eggs till that divine yellow filling just pops on out all buy itself leaving a very clean space for the refill.
Not all kimchi’s are the spicy bomb
- The aroma test: Good quality kimchi should have a strong, pleasant aroma that’s a delightful mix of spicy, sour, and fermented notes. If it smells off or overly pungent in a bad way, it might not be at its best.
- The texture check: Take a look at the texture of the kimchi. It should have a nice crunch from the vegetables while still being slightly soft from fermentation. If it’s mushy or overly slimy, it might be past its prime, or it could be the amount of glutinous rice used in the ferment. Whilst that’s not necessarily a bad thing in this recipe, it may not be pleasurable to use the rest of the package – so try to find a kimchi that meets your texture needs (that’s why I ferment my own)
- The color examination: Fresh kimchi typically has vibrant colors, with the cabbage retaining its natural green and white hues. However, as it ferments, it develops a slightly translucent appearance. If the color looks dull or excessively brownish, it might be over-fermented. Similarly, if it’s too bright, it might be full of unnecessary preservatives which both affect the flavour and quality of the overall result.
- The taste test: Of course, the most crucial test! Good kimchi should have a well-balanced flavor profile—spicy, tangy, and slightly salty. It should also have a pleasant level of fermentation, giving it that characteristic tang. If it tastes overly sour, overly salty, or lacks complexity, it might not be the best quality.
- The gas release: When you open the container or bag of kimchi, there should be a noticeable release of gas or bubbles, indicating active fermentation. This is a sign that the healthy bacteria responsible for fermentation are still active. If there’s no gas release or the kimchi appears flat, it might have been fermented and or full of preservatives.
A note on ingredients
Especially when dealing with a recipe this simple, ingredients matter… good quality eggs are the basis of this dish, so get your shopping bags and get ready to head on down to the farmers market.
Eggs: Most eggs will do but I will always preference pasture-raised organic free-range eggs. I just find the yolks to be superior in flavour and I feel good eating them knowing that the chickens that produced them are living out their most chickenness fantasy of an existence. That said, any old free-range eggs will probably do.
Mayonnaise: In our household, we tend to make our own, but for this recipe, I very much recommend going the commercial whole egg mayo. It just has another dimension of flavour that I’ve always struggled to get in our homemade version. Not that I like using highly processed foods or ingredients, but there’s just something in the processing of this one that’s very hard to recreate as a home cook.
Kimchi: notes as above, just please make sure to chop it finely or it will get stuck in your piping bag! If you want to go the whole hog you are welcome to create your own using this recipe I also prepared earlier. Insert winky face here.
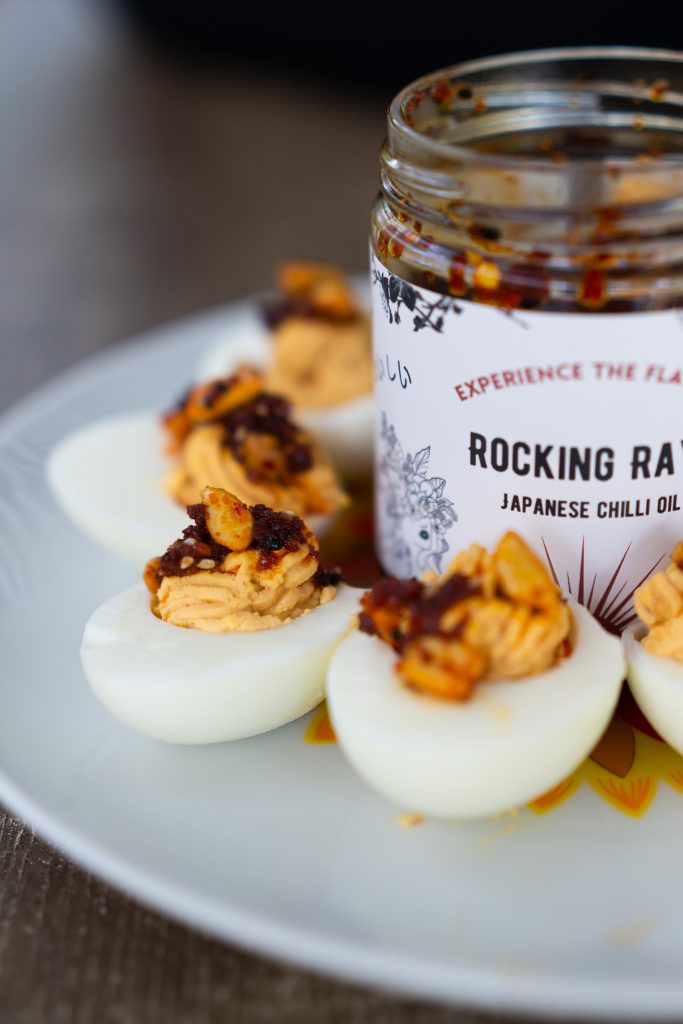
Rayu: If you dont’ have access to rayu you can use a peanut and chilli oil mixed with something sweet instead. Obviously, I’m going to advocate for the delicious flavour bomb that is my own product, but I do understand not everyone who cooks this will have access to it.

Korean-style deviled eggs
Equipment
- 1 Pot
- 1 piping set with large star nosel
- 1 mixing bowl
Ingredients
- 6 large eggs
- 1 tbsp gojuchang paste
- 1 tbsp kimchi chopped super fine
- 2 tbsp mayonnaise
- 1-2 tbsp rayu (or peanut chilli oil )
Instructions
- Boil the eggs for 8 – 10 minutes. Leave in cold water to cool down and peel when you can handle them safely.
- Cut the eggs in half and pop the egg yolk out into a bowl (it should be completely firm)
- Mix the kimchi, egg yolk, mayonnaise and gojuchang paste until well combined and a creamy consistency. I usually do this with a fork.
- Put the mixture into a piping bag and pipe into the egg whites (filling them to about 1 cm tall)
- Place the eggs on what ever dish you wish to serve them on (top tip, you can use any excess yolk mixture to help secure your egg whites on the plate) and then top with rayu.
- Refrigerate for at least half an hour and serve cold.
Did you make this recipe?
Lovely. Now let me know how you liked it. Tag me @thetastyspoonful on Instagram or send us a message on Facebook @ The Tasty Spoonful
While I have you here, may I suggest you try these next:
Until next time. Keep following, liking, sharing, commenting and cooking, and may your every spoonful be tastier than the last!

